

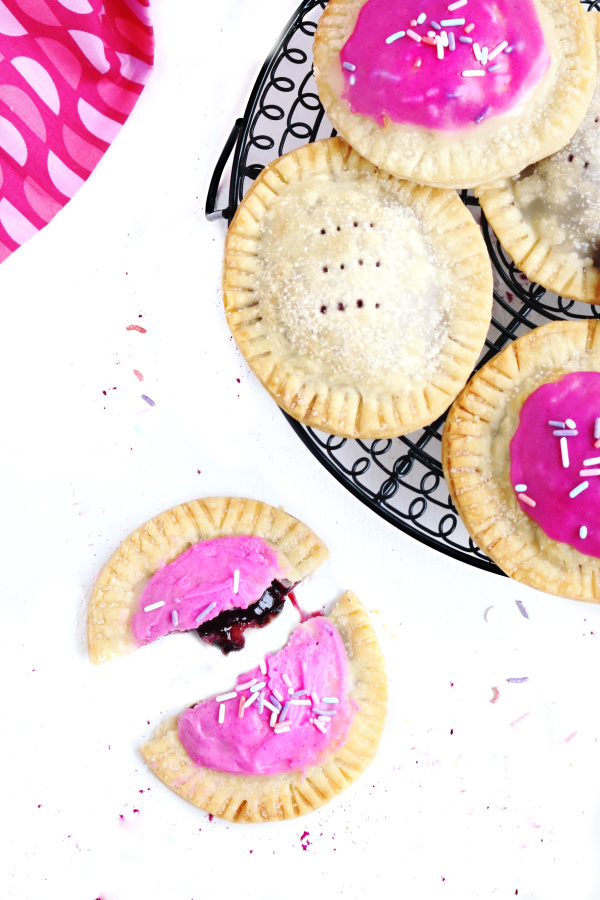
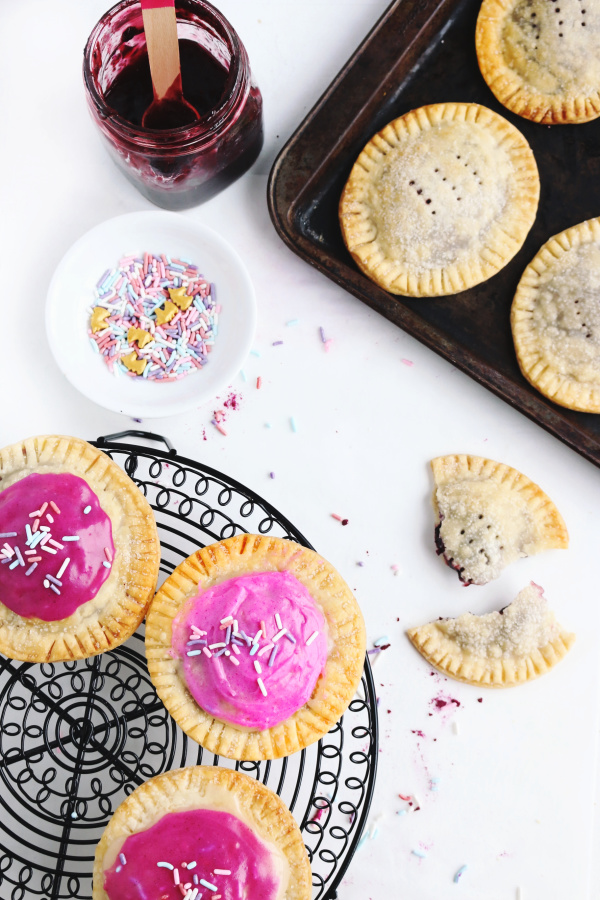
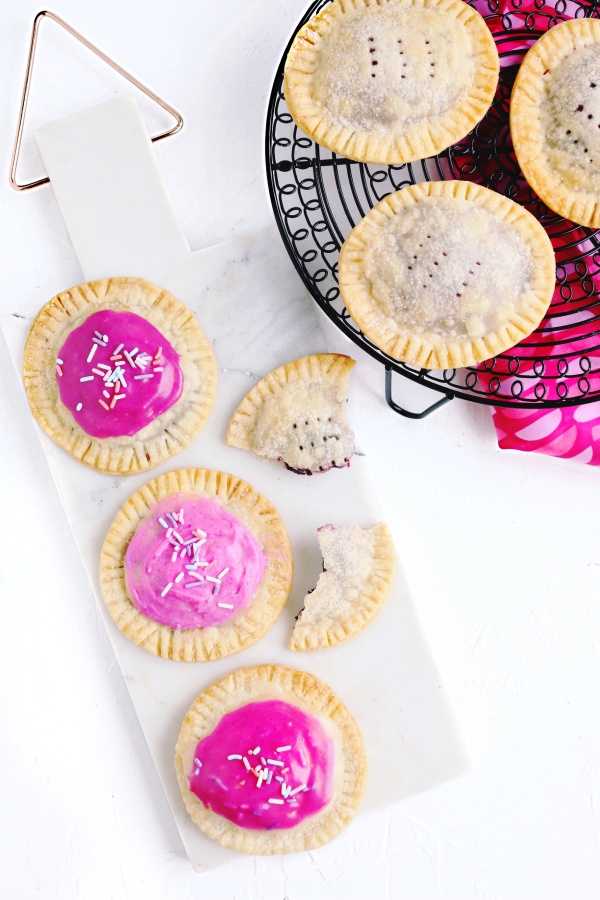
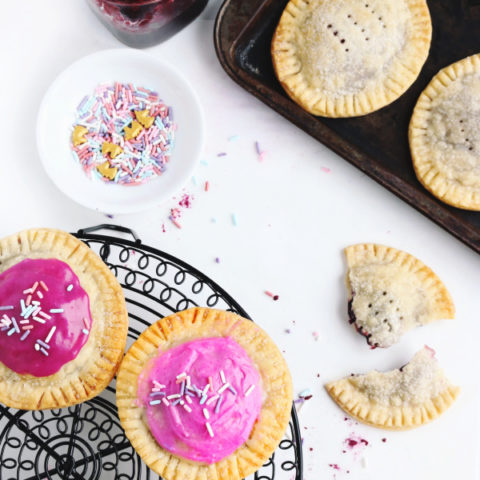
These homemade berry pop–tarts are made with an easy, flaky, buttery pastry crust, filled with berry compote and chocolate chips, just for fun!
I didn’t expect these to be such a hit on Instagram but when I posted a picture of these homemade vegan pop tarts, you all were asking for the recipe.
It was one of my favorite breakfast pastries growing up and one of my most eaten foods during college (well that and Ramen). Thank goodness for a high metabolism back then and thank goodness for this healthier, homemade version so I can still enjoy them all these years later.
How do you make a Pop Tart?
To be honest, making vegan Pop Tarts at home can be intimidating but don’t let it scare you away! I’ll share with you how to make it in a 3 easy steps.
- Make your pastry crust (Skip this step if you have a store-bought brand you love and trust).
- Homemade filling (totally must do this step BUT if you’re in a time crunch, your favorite jam will also work).
- Make the icing (it’s more like a glaze but you get the idea)
What is Pop Tart crust made of?
First step. My Grandma’s homemade pie crust made with flour, shortening and cold water. I started here then changed it just so slightly, adding in cold vegan butter to make a more flaky crust. The key to perfecting this step is to make sure the fats and the water are cold! The colder the dough is, the lighter it is!
Divide the dough in half and keep refrigerated until ready to use. Then working with 1 dough ball at a time, roll out into a rectangle, about 1/8″ thick and either cut into 3×4″ rectangles or use a large round biscuit cutter to trim into shape. This will be the bottom of your pop tart. Lay on parchment paper and refrigerate then repeat with the second dough ball to make the top of your pastry.
Refrigerate these cut outs as you make the filling. Remember…cold is key!
What flavor combinations can you use for the filling?
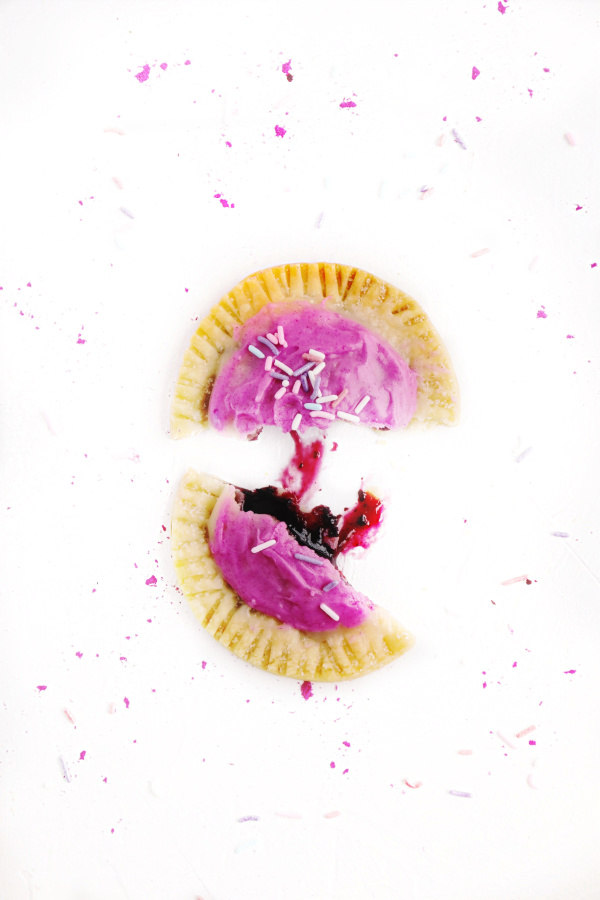
Raspberry chocolate chip is my fav! This pop tart filling is the best part, but then again, I’m a little biased to anything containing berries and chocolate.
You can easily whip up a batch of homemade berry compote by using berries, sugar, water and a splash of lemon juice. That’s all, just 4 simple ingredients. Allergy-friendly chocolate chips are layered on top of the jam just for fun & when it all melts together, its simply amazing!
Here’s a few other combinations for your Pop Tart Filling:
- Brown Sugar Cinnamon
- Chocolate Marshmallow (think S’mores)
- Apple Pie
- Cookie Dough
- Any Berry or combination of berries
What is Pop Tart Icing Made of?
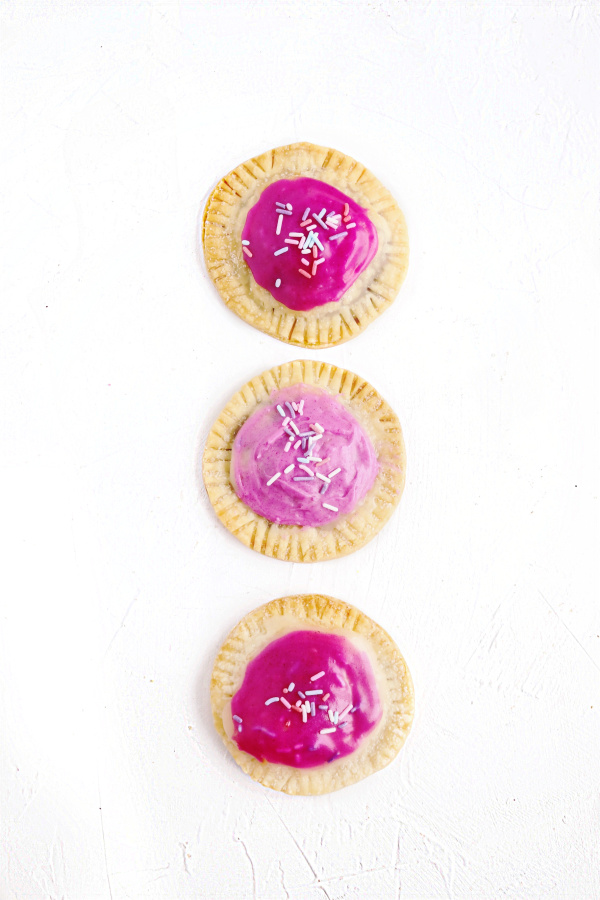
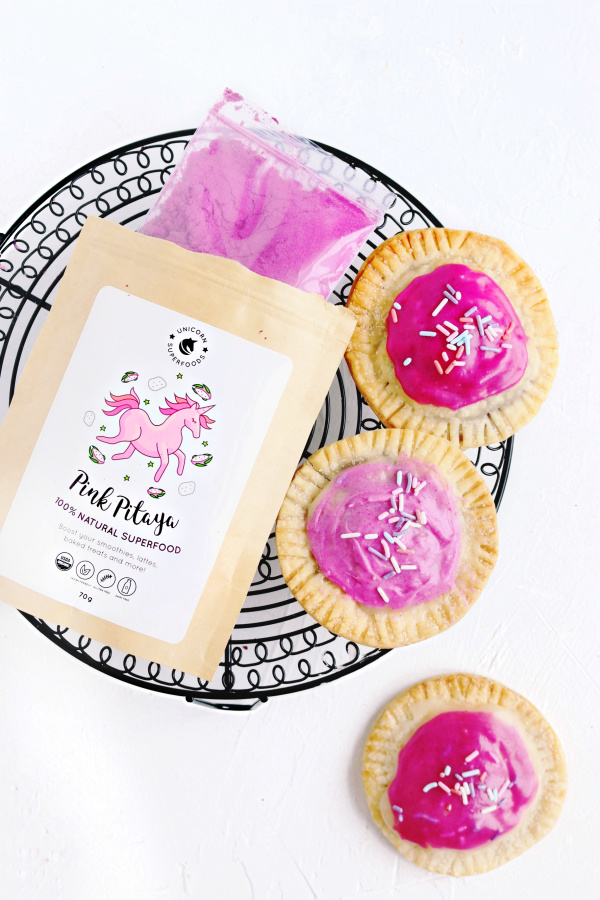
Just a few ingredients including confectioners’ sugar and milk will do the trick but I added in a spoonful of Pink Pitaya powder for color, taste & nutritional value. I love Unicorn Foods but I also like this blend by PopJoy which you can order from Amazon.
Simply whisk ingredients together until thick but still a little runny. Use the back of a spoon to spread on top of each homemade pop-tart.
And there you have it! Your homemade, vegan pop tarts are now ready to eat.
They do require a few steps but guys, you NEED to make these! Those foil-packed varieties just don’t compare against our berry-filled pastries. Simply knowing that these are made from scratch, without all the weird ingredients or allergens, and made to your liking is more than worth it.
Vegan Berry Pop Tart (Gluten-free & Allergy-friendly)
These homemade berry pop-tarts are made with an easy, flaky, buttery pastry crust, filled with berry compote and chocolate chips, just for fun!
Ingredients
Pastry Dough
- 2 1/2 cups flour (all purpose or gf 1-2-1 blend, like Bob's Red Mill)
- pinch of salt
- 3/4 cup refrigerated vegan shortening
- 6 tablespoons cold vegan butter
- 1/4-1/2 cup ice cold water
Raspberry Filling
- 2 cups raspberries (fresh or frozen)
- 1/2 cup cane sugar
- 2-3 tablespoons water
- 1 tablespoon fresh lemon juice
Glaze
- 3/4 cup confectioners sugar, sifted
- 1 tablespoon dairy-free milk (more if needed)
- 1 teaspoon Pitaya Powder (optional)
- 1/2 teaspoon vanilla extract (optional)
Instructions
For the Dough:
- Mix the flour and salt together in a large bowl. Using a pastry cutter or two forks, cut in the cold butter and shortening until the mixture resembles coarse meal (pea-sized crumbles). Measure 1/2 cup of water in a glass container then add ice & stir to make it really cold. Slowly add in cold water 1 Tablespoon at a time, stirring with a large spatula after every add. Do not add any more water than you need to. Stop adding water when the dough begins to clump.
- Roll out the dough on a lightly floured work surface. The dough should come together easily and should not feel overly sticky. Form the dough into a ball. Divide in half. Flatten each half into 1-inch thick discs using your hands. Wrap each tightly in plastic wrap. Refrigerate for at least 1 hour (or up to 5 days).
Make the Berry Filling:
- Place berries, sugar and water in a small saucepan and let it cook down, breaking down the berries until it looks like a runny marmalade. If using raspberries only, they will thicken on their own as it cools, but if using a mixture of berries, whisk in 1 teaspoon of arrowroot powder once removed from heat. Once completely cooled, add the lemon juice. **Additional water may be needed if its too runny, but that will depend on how well it thickens.
Pop-Tart Assembly:
- Remove the 1st chilled dough disc from the refrigerator and allow it to sit at room temperature for 15 minutes. This will help make the dough easier to roll and work with. Then place disc onto a lightly floured work surface, and roll it into a 9x12" rectangle about 1/8 inch thick. Trim the sides as needed. Cut each piece of dough into thirds and each third into thirds again. You will end up with 9 rectangles, each measuring 3×4 inches. A ruler can help make this process easier and more accurate. (You can also use a large round cut out if you prefer a round pop-tart shape.)
- Place each of the rectangles onto a baking sheet lined with parchment paper. Add 1 heaping tablespoon in the center of your rectangle (or round) and top with 1 teaspoon of miniature chocolate chips (leave 1/4" of space on the edges to seal). Place the baking sheet back in the fridge. Roll 2nd disc out into a rectangle and cut into 9 even rectangles like you did with the first half of the dough.
- Brush rectangles lightly with milk, then place each on top of the filling-topped rectangles, milk side down. Use your fingertips to press firmly around the pocket of filling, sealing the dough well on all sides. Use a fork to press make fluted edges.
- Poke holes in the tops of each filled pastry. Refrigerate the filled pop-tarts uncovered while oven is heating.
- Preheat oven to 350°F . Once unbaked pop-tarts have chilled for 20 minutes, remove from the refrigerator and bake for about 20-25 minutes or until they’re golden brown, rotating the pan halfway through baking. Let the baked pop-tarts cool on the pan for about 5 minutes, then transfer to a wire rack to cool completely before glazing
Make the Glaze:
- Whisk all of the glaze ingredients together in a medium bowl until it reaches a spreading consistency. You want a thicker, yet spreadable glaze.
- Use a spoon or knife to glaze each pop-tart. The glaze will slightly harden in if allowed to sit 30 minutes before serving.
Notes
*Use store-bought pie dough if desired.
**Homemade compote can be substituted with your favorite jam from the store.
See more breakfast recipes
Some of the links above are affiliate links, which pay me a small commission for my referral at no extra cost to you! Thank you for supporting Allergylicious


My kids would love these, especially with that vibrant icing!
If they are like my kids, then yes…they’ll love them.
Oh my goodness – what girl wouldn’t love these (or boy actually)? Adorable and well worth the effort!
I definitely need to make these! My family would love these 🙂 That pitaya powder is pretty neat, I’ve never seen it before, but the color is beautiful!
So so very yummy!! I have made these a few times now and my boys love them! Strawberry, blackberry, and brown sugar cinnamon- all scrumptious! With two busy toddlers at home and not a lot of time at one time. I did find it easier to make the dough a day or two ahead, it was a lot to do all in one day when I did it the first time.
Love that you shared making the dough in advance. I usually make extra dough and refrigerate for when I’m craving these.