

You CAN have your bread and eat it too!
When food allergies come into play, I know it can be very difficult to find the right foods when shopping. Grabbing a simple loaf of bread becomes a 15-20 minute ordeal simply due to the extent of label reading that is required.
I know when my son was diagnosed with allergies to dairy and eggs, it seemed as though choices were slim. Mind you, there are more options out there now, especially if you have to eat Gluten Free, but the choices are slim if you have multiple food allergies.
When I started cooking meals for a client of mine, one of the requests she had for her son was for bread. The kind of bread she could make a sandwich out of without defrosting or heating up first. One that when you dropped it on your foot, it wouldn’t break your toe. Her son had an allergy to gluten and since I don’t bake or cook with dairy or eggs in my home (due to cross contamination) I had to be very creative.
This is the one that was a hit with everyone, even our non-allergy friends. It does make 2 loaves, so feel free to freeze one and save it until later (although it won’t be in there long as this bread is eaten up quickly!)
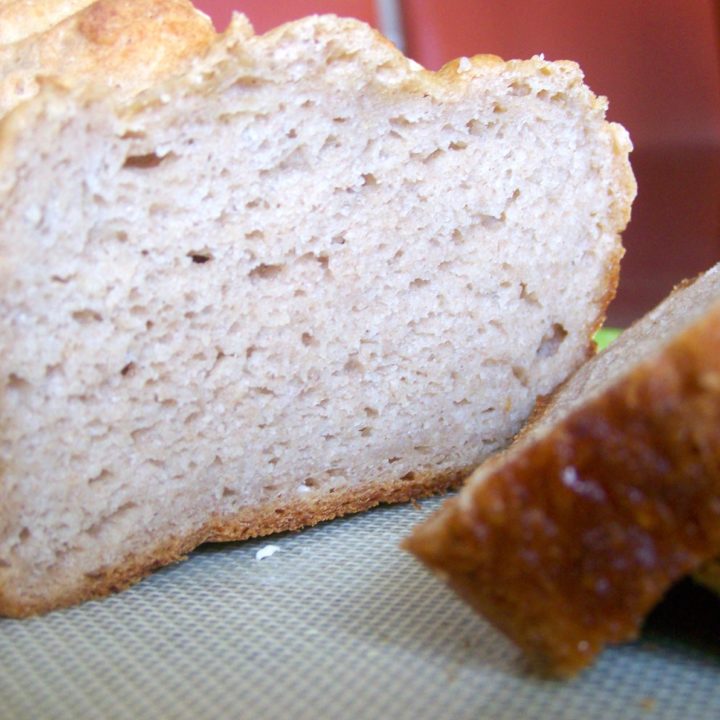
Gluten Free Vegan Bread
Want a bread to mimic traditional bread, without all the allergens? Then this one is for you!
Ingredients
- 1 1/2 cups millet flour (or - I USED GF OAT FLOUR)
- 1/2 cup teff flour
- 1 cup sorghum flour
- 1 cup cornstarch (or double the potato starch if you can’t eat corn)
- 1 cup potato starch
- 1 cup tapioca flour
- 4 tsp xanthan gum
- 1 Tbsp salt
- 1/2 cup sugar
- 2 Tbsp active dry yeast (not rapid rise)
Add:
- 4 tsp olive oil
- 3 1/4 cup warm water (not hot)
Instructions
- In a large mixing bowl, combine the first set of ingredients.
- Add in olive oil and warm water.
- Mix together using your stand mixer with the paddle attachment,. The bread dough will be more like a sticky cake batter .
- For the best rising: While mixing the bread, create a proofing box from your microwave. Microwave a small mug with water approx 3 min. Leave the water in the microwave. Pour the bread dough into two nonstick or well-greased pans. Tuck the loaves into the microwave with the water—the container of water should not be touching the pans. Allow to rise until batter extends a bit over the top of the pans–generally 30-40 minutes.
- Bake at 400 degrees for 10 minutes. Remove loaf pans from oven and lightly cover with aluminum foil. Return to oven and bake for an additional 35-45 minutes, depending on your oven. (You can double check by using a toothpick inserted in the center to see if it comes out clean .)
- Once it is done baking, remove from oven and allow to cool. It will slice best when cooled. If you won’t be eating it within 2 days, after it’s cooled, slice it, wrap it in a couple of layers of plastic wrap, and freeze it. Never refrigerate this or other bread—it will get dry and hard if you do. If you leave the bread on the counter (wrapped), it will be good for all purposes for a couple of days. After that, it will be best used for bread pudding, French toast, croutons, etc.
- Enjoy!


Hi! When you take the loaves out of the oven the final time do you cool them in the pans or take them out? Thanks so much!
Hi Rachel, You found one of the older posts. Glad you did! I actually let it cool in the pan before removing. It seems to help it all set perfectly into place.
Thank you!
Of course! Let me know what you think of the recipe or if you did anything different to it.
I am wondering what size loaf pans you used for this bread?
Mine is an 8 1/2 by 4 1/2
Thank you for getting back to me. Much appreciated.